Monday, November 9, 2009

lights and shadows


Imagine you are alone on a serene deserted island. You close your eyes and lift your chin upwards- to the sky. Do you feel the kiss of the sun's rays hitting your face in some areas more strongly than in others?

The places that the sun might hit are parts of your facial structure that protrude, or stand out. These places include your forehead, the apples of your cheeks, the nose, and the chin.

The places where the sun may NOT hit as strongly are: the temples, the hollows of the cheeks, and the jawline. These places are defined as recessed due to the fact that they are areas that do not protrude, or stand out.

The need for lights and shadow arise after the base or foundation is applied. When you apply base or foundation you wipe out the natural highlights/lowlights as well as any oily sheen, acne, and imperfections. Basically you try for a clean slate. What we do when we apply highlights/shadows is try to put the natural highlights BACK into the face.

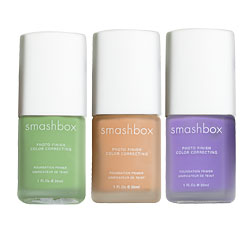
How to do this? From the methods I've toyed with over the years... the easiest method would have to be makeup sticks. Buy two makeup sticks, they can be any brand suited to your needs (oily, matte, acne-prone, etc..) and they look like this...


You certainly don't need to buy top shelf (aka.. expensive) products but you might want to splurge because a little goes a looooong way and you are putting it on your face after all... but revlon or cover girl make an equally good makeup stick. You need TWO sticks: one 2-3 shades lighter than your natural skintone and one 2-3 shades darker.


Begin with a sponge and the lighter makeup stick. After applying the base/foundation application, using the Light stick, rub in a bit in the middle of the forehead. Apply some in the highest point of the cheekbone. Apply a bit more (in a straight line) down the length of the bridge of your nose. Lastly, a bit on your chin. Using your sponge, gently press the color into the skin- Don't Rub! There... we have finished putting some natural highlights into your face, glowingly pretty!

Now using the Dark stick, apply some to both sides of the temple, a teeny bit along the outer edges of the bridge of your nose, the underneath of your cheek (hollow part that is sunken in a bit) a bit on both sides of your jawline, and blend together with the sponge. Remember to use a different side of the sponge so you don't mix light and dark and ruin your beautiful work!

Once you've finished, look carefully into the mirror and see if there are any smudges or hard edges that need to be blended away... when you've finished lightly dust with translucent powder and you are good to go.

This look is great if you have some glam function where pictures will be taken and you want to look show-stoppingly amazing! This isn't typically your day to day look unless, of course, you want to look show-stoppingly amazing every day! ;)

understanding color


For our simple makeup purposes, we only need to understand the basics of the color wheel.

Primary colors: as we should remember from dipping our hands into messy pots of paints as kids, are the most basic colors from which all other colors are created: red, yellow, blue.

Secondary colors: are derived from mixing the primary colors together: orange, green and purple.

Tertiary colors: are the colors you get from mixing the primary and the tertiary colors (next to each other) on the color wheel...

In looking at the outermost circle containing all colors, we can choose one color and go across the midpoint of the circle to the other side, where we can find it's color opposite and complementary color. For example, green and red, purple and yellow. These colors tell can often bring out other colors simply by being its striking opposite.. * think how awesome the color green looks on a redhead and you'll catch my drift...

Taking the information from these color wheels, we can learn about a variety of other clues including our *undertones and how to balance them, *what it means to be cool or warm hued, * what shadows look great together.

Now we can try to tackle these questions with the help of the color wheel.


Now you've all seen these strange color coded things whether they are in a tube, paste or powder form, our faces aren't lilac colored so what are these candy inspired creations for?? Well, you don't have lilac skin, but have you breakouts, ruddy skin, and dark under eye areas?

-Acne, breakouts and other blemishes are usually a shade of red... therefor the green concealor will work to cancel out the red to a neutral.

-Dark eye circles are usually a shade of blue or purple, choose the yellow tinged concealor to cancel out the violet undertone.

** Always match concealors to skintone not the color of discoloration.


Ever wonder if you were a cool tone vs. a warm tone person?? Simply strap on a siver and gold necklace and see which precious metal looks the best with your skin. Usually the silver tone indicate cool tone which means you look wonderful in
colors (both makeup and clothing)that exist on the right side of the color wheel. For the gold: warm tone lovelies you look best in warm tones or colors on the left side of the color wheel. For the red lipstick test: try wearing red lipstick in shades that flatter either the cool/warm undertone I guarantee you'll look awesome!!


Wearing eyeshadow can get pretty tricky given the myriad of colors available to us... using the color wheel as a hint, a general rule (that was made to be broken, as there ARE NO rules in makeup)can be created: colors next to each other on the color wheel fade nicely from one to the next. I like to place darker colors on the bottom and trick the eyes into seeing lighter and lighter as you go up. For example, choose a dark purple hue close to the lash line a mid purple or lilac as a mid color and blend upwards into a pale baby pink. so pretty!!

Until next time, have fun with makeup!

Saturday, November 7, 2009

an introduction is needed...


Hi Everyone...

I've created this blog because of my deep love for makeup. I graduated from MUD- Makeup Designory (a really great school!) in Burbank, CA and look forward to sharing all my learning and edumacation with you all. I am also blessed with an esthetician license as well so facts on skincare and the rest... I will divulge! I will be writing for the people who have no clue as to what they're doing with makeup (eeeek... what goes WHERE?!) and sharing beauty secrets with you along the way.